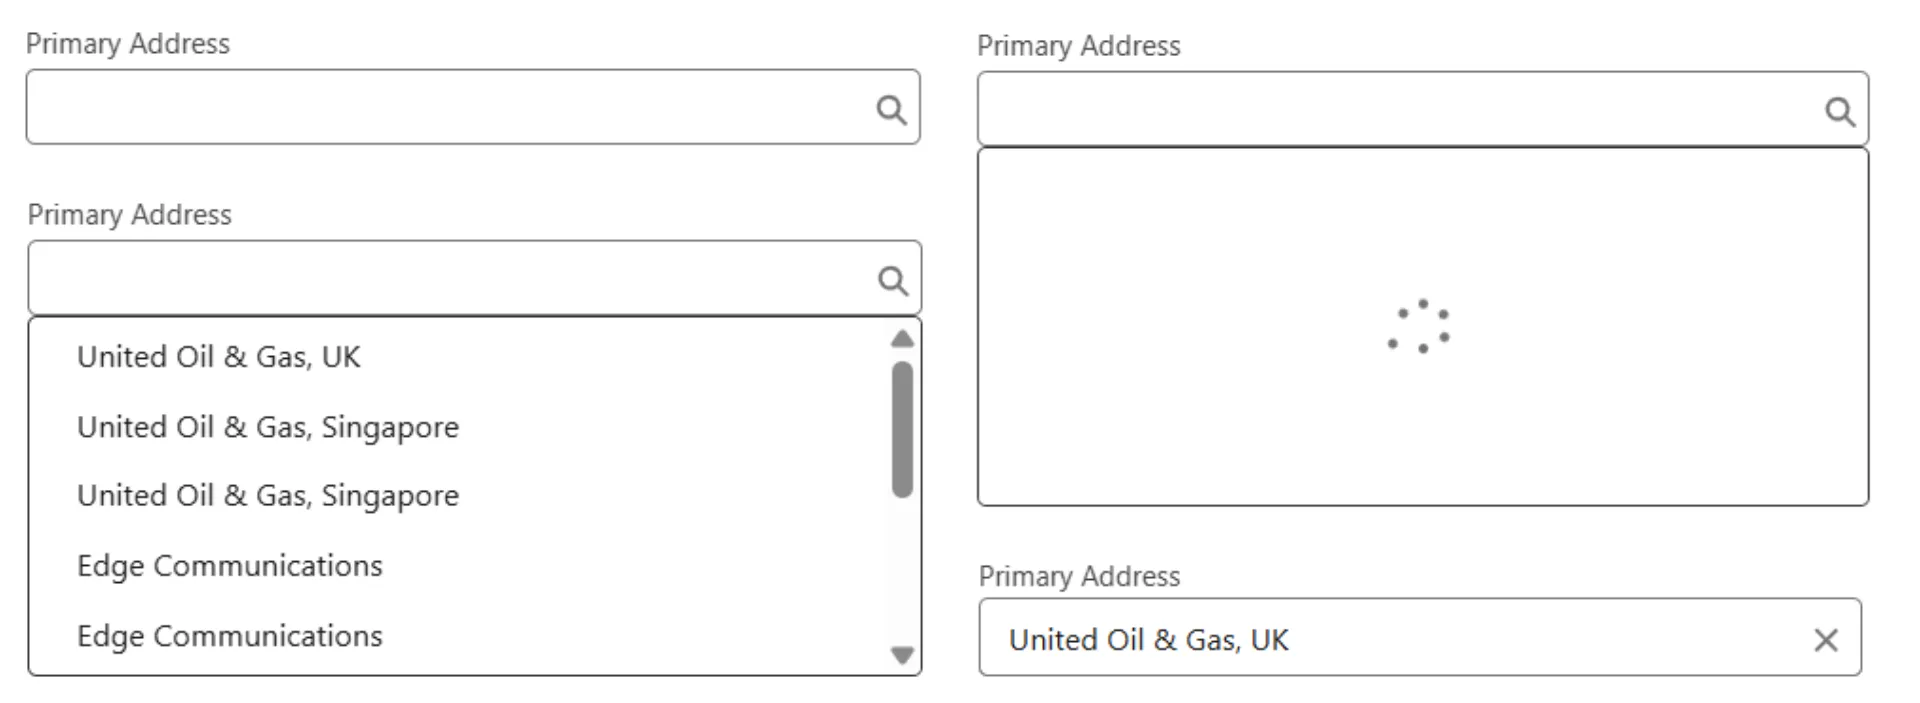
In our previous posts, we developed a fully functional Custom Lookup Field with performance enhancements, and accessibility improvements. Now, it’s time to integrate this component into a Salesforce LWC and see it in action. This post will guide you through these steps and show how to make the use of custom lookup field we’ve built through out this series.
You can follow along with the full code from the Salesforce Custom Components.
Integrate Custom Lookup Into Another LWC
To get started, we first import the custom field Primary_Contact__c, which we created on the Account object, to demonstrate how the custom lookup works interactively. Next, we use getRecord and getFieldValue from uiRecordApi to fetch the field value for a specific Contact record, using the recordId. Thus allowing us to show the values for the current contact record.
import { LightningElement, api, wire } from 'lwc';
import { getRecord, getFieldValue } from 'lightning/uiRecordApi';
import PRIMARY_CONTACT_FIELD from '@salesforce/schema/Account/Primary_Contact__c'

export default class SCMainComponent extends LightningElement {

  // non decorated properties
  primaryContact = '';
  primaryContactField = PRIMARY_CONTACT_FIELD;

  // api properties
  @api recordId;

  // wire methods
  @wire(getRecord, { recordId: '$recordId',  fields: [PRIMARY_CONTACT_FIELD] }) wiredContact({data, error}) {
    if(data) {
      this.primaryContact = getFieldValue(data, PRIMARY_CONTACT_FIELD);
    }
    if(error) {
      console.log(error);
    }
  }
}
Create Custom Metadata Record
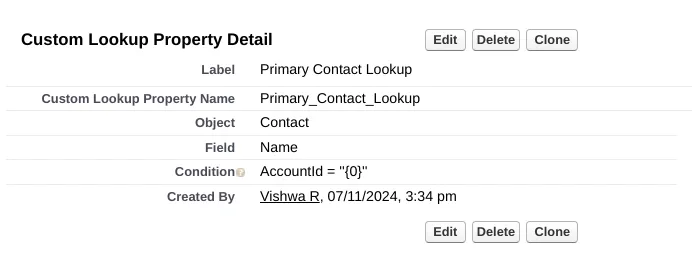
In part 1 of this series, we have created a custom metadata type called SC_Custom_Lookup_Property. Now we are adding a record for it, as we need this for embedding this component.

In the example below, you’ll notice Account="{0}". This means that when using this lookup name in custom lookup, we need to pass a value for {0}. This value corresponds to the first entry in the filter-values attribute..
If multiple filter conditions needed, we can structure them like Account="{0}" AND Something="{1}". In this case, we need to pass the values as a comma-separated string when configuring the component.
Define HTML Template
Lets write the HTML for custom lookup component and button with the associated properties and event handlers.
<template>
  <div>
    <c-s-c-lookup-field
        name="contact"
        label="Primary Contact"
        value-id={contactId}
        value-label={contactName}
        filter-values={recordId}
        lookup-name="Primary_Contact_Lookup"
        onchange={handlePrimaryContactChange}
      ></c-s-c-lookup-field>
  </div>
  <div>
    <lightning-button
      variant="brand"
      title="Save"
      onclick={savePrimaryContact}
    ></lightning-button>
  </div>
</template>
Here’s little explanation of what we did in the above code:
- The
lookup-nameattribute is set to DeveloperName of the custom metadata record which we have just created. - The
filter-valuesattribute we are passing the recordId as we need to pass just the accountId.
Handle Save and Value Change Events
Remember in our first post we were sending the valuechange custom event whenever the custom lookup value change. We are going to listen to that event from this component and update our state variable.
We are going to save the custom lookup values using updateRecord method.
// event handlers
handlePrimaryContactChange(event) {
  this.primaryContact = event.detail.value;
}

savePrimaryContact(event) {
  const fields = {};
  fields[PRIMARY_CONTACT_FIELD.fieldApiName] = this.primaryContact;
  fields.Id = this.recordId;
  const recordInput = {fields};
  updateRecord(recordInput)
    .then(() => {
      this.dispatchEvent(
        new ShowToastEvent({
          title: "Save success",
          message: "",
          variant: "success",
        })
      );
    })
    .catch((err) => {
      new ShowToastEvent({
        title: "Unable to save communication preference",
        message: err.body.message,
        variant: "error",
      })
    })
}
Don’t forget to import the updateRecord from lightning/uiRecordApi. I was debugging the same for 15 minutes before finding out that I missed the import.
Conclusion
In this post, we demonstrated how to integrate the Lookup Field component into other LWC, handle value change, and update the record.
To see the full code and more, visit the GitHub repository: Salesforce Custom Components.
Thank you for following along on this journey of building a custom lookup component. Stay tuned for more updates, and happy coding!
